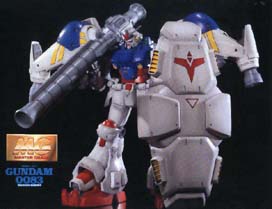
The following has been kindly contributed by VRaider. A simple and direct guide to painting an anime model.

The
Basics
Painting can be as fun as it is easy once you get the hang
of it. I my self like to paint models. In this tutorial I will attempt
to teach you some things for painting your own custom models. You can
e-mail me at VRaider@aol.com for questions or comments.
Painting Your First Model
Models can be expensive now a days! They range any were from 10- 50 US
dollars for a good one. But I suggest you buy the 15-30 dollar ones to
practice on. You'll also need:
-Palate
-Water pot
-Primer (Spray paint)
-Super glue
-Acrylic Paints
-Brushes, 0 is a good standard brush, 0/3 is good for fine details
-Good working space
-Ink
-This putty stuff (I don't know the name) that lets you fill in gaps.
-It helps to be able to read and have at least some way of seeing.
Painting
Snap Together and/or Plastic Models
SKIP THESE STEP IF YOUR MODEL IS A GUNDAM OR A SNAP
TOGETHER THAT IS ALL READY PAINTED!
As you see, your model is (I hope) all ready put to gather and has a base
color. But This Plastic will NOT let your paints stick probably making
them peel off and fade easily. But we can fix this! That's what the Primer
is for. First decide what kind of colors you want to use. If there mostly
light then
take out a white primer, if there mostly dark use a black primer, and
if your not really sure (I don't recommend it) get a gray primer. Then
spray it all over the model covering 100% of it. Spray in
Bursts and NOT in a long blast because it will waste the paint inside
it. Then wait about 20 min and come back and do another coat for a total
of 2. If you missed any spots you can go over it with that color paint.
Still with me?
This is the easiest part.
Good, now you need to decide what color you want to use as the base color.
For my marine I used a dark green. Once you've decided on that, take that
color get some on your brush, dip it on your palliate. What you've just
done is know as thinning your paint, never use it strait out of the jar
because it will be to thick and wont come out nice and smooth, more like
clumpy and nasty. Cover the hole model except the gun and face. Still
with me? Good. Wait for the paint to dry (if you have it under a fan it
will dry quicker) and lets go on to the next step...
OK YOU LAZY PRE-PAINTED PEOPLE, YOU CAN READ FROM HERE ON!
Ok, good now that you have your paints (for all you other people who are
just reading, look at the colors of your model and get the acrylic equivalent
paints, i.e. if there's red get red paint) Now make sure you thin out
your paint (Dip your brush in the paint, the strait in the jar of water
and then
on the palate, if its still thick, dip the brush in the paint and back
on the palate) and paint all the parts over with the right colors and
remember, be neat!
Well that's it! Your done with the basics! If you have a pewter (metal)
model fallow all the steps but make sure you clean your model for Flash
(lines left from the casting) and other parts that don't belong there.
And make sure you give your model a bath! That's right, a bath. Scrub
it with soap and water and rinse it before you prime it, this will take
off any flash and mold on the pewter piece.
In the next section I'll talk about advanced things you can try. I hope to get a digital camera in May so I can take pictures for you!
All rights reserved.
Sign Guest Book | Home | Exit
Please read the credits
for complete copyrights.
